How to use MapMyPath
A step-by-step guide for using MapMyPath.
Take the guesswork out of degree planning
With MapMyPath you can:
- Add a course or exam credits to your Learner Profile
- Explore different degree plans
- Plan your courses for a degree plan
- View terms and acronyms you may need throughout the planning process
What you’ll need
Official transcripts
College or high school transcripts aren’t required to use MapMyPath. However, they make it easier to get an accurate view of your progress toward completing a degree plan.
Exam scores
You’ll need to know your scores for any Advanced Placement (AP), College-Level Examination Program (CLEP), and International Baccalaureate (IB) exams. MapMyPath will show how your scores may count toward college credit at a variety of Texas public colleges.
How to add a course or exam score
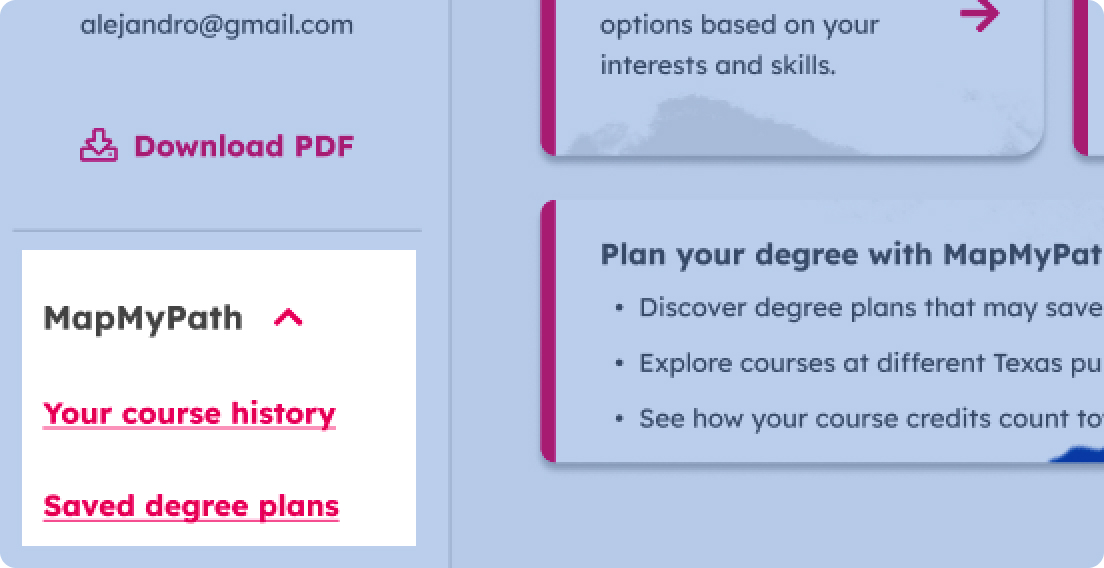
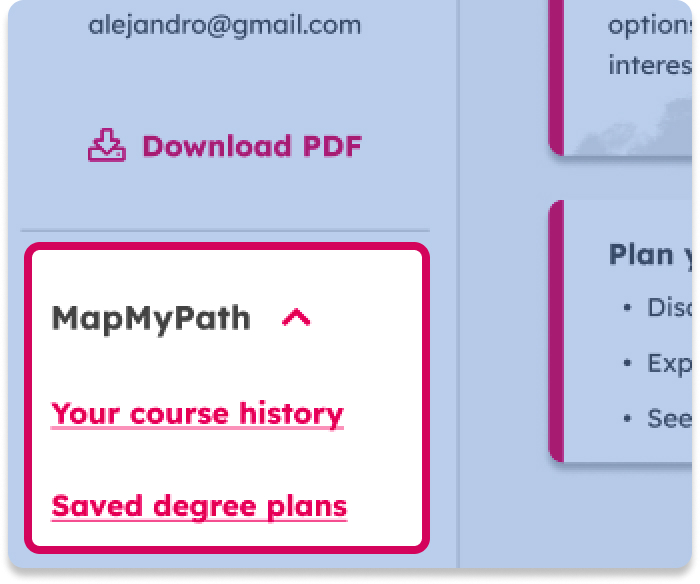
Access MapMyPath from the left-hand column in your Learner Profile. Select the Your course history link.
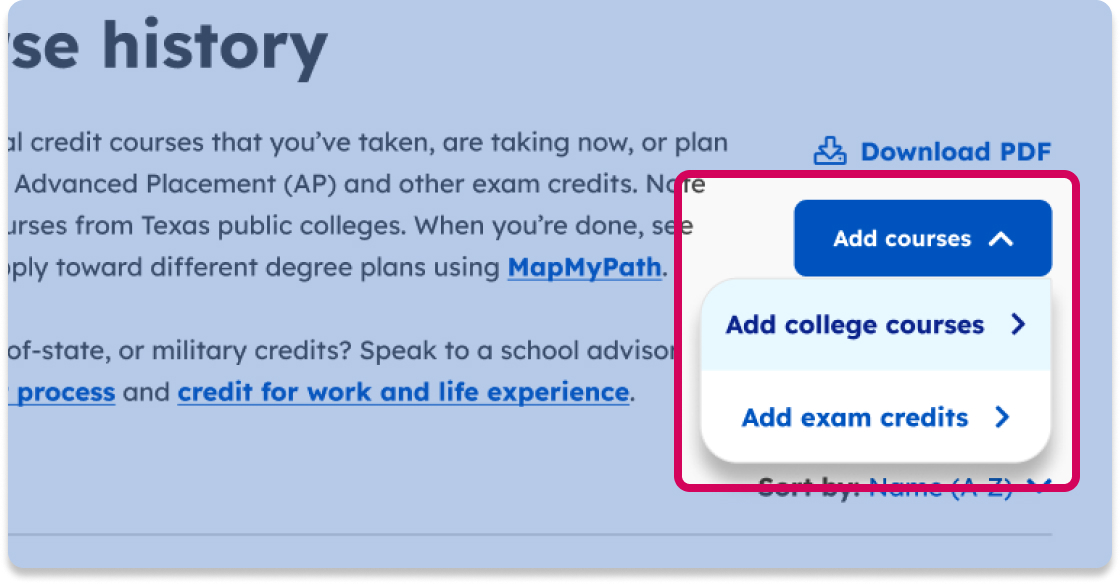
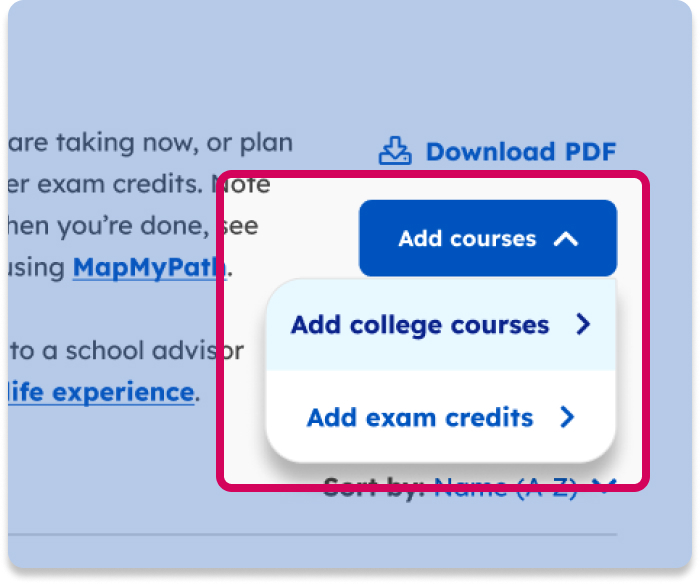
To add courses or exam scores to your course history, select the Add courses button.
Next choose whether you want to add a college course or exam score.
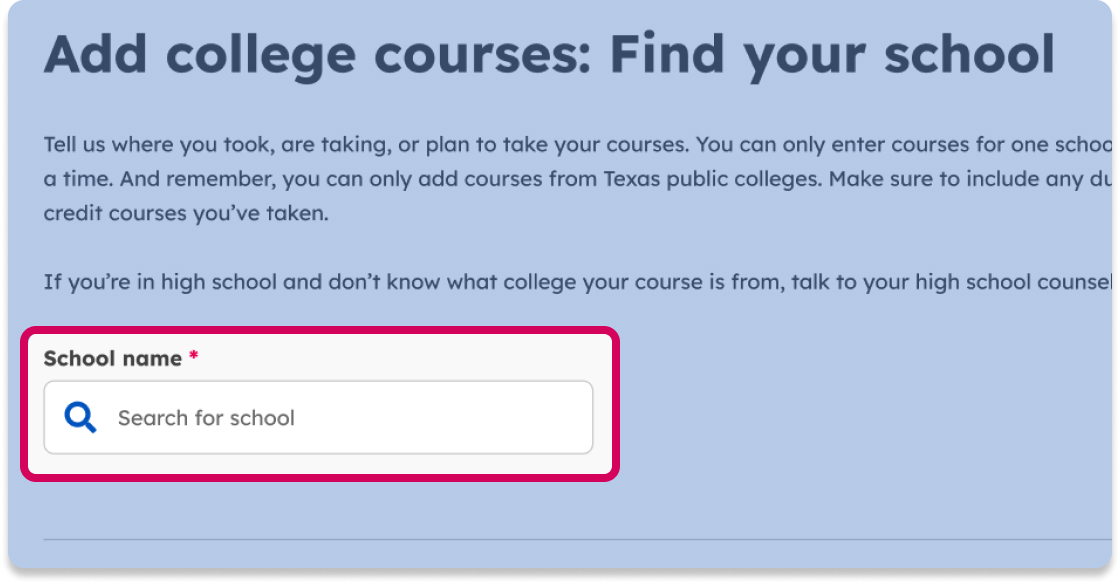
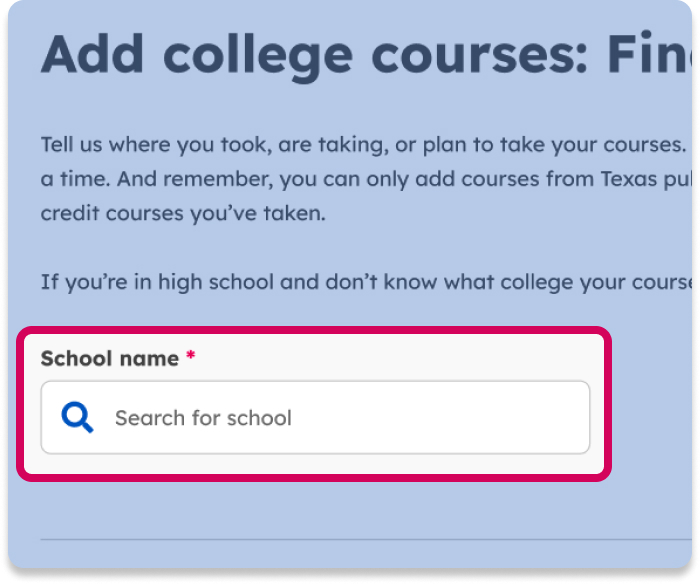
To add courses
First, find your school. Start typing your college’s name into the School name search box. Select your school once it appears in the dropdown below the search box. All Texas public colleges are listed.
Add courses from one college at a time. You’ll also need to indicate whether you’ve completed the class, if it’s in progress, or if you plan to take it.
Provide your grade, term, and year taken, if applicable.
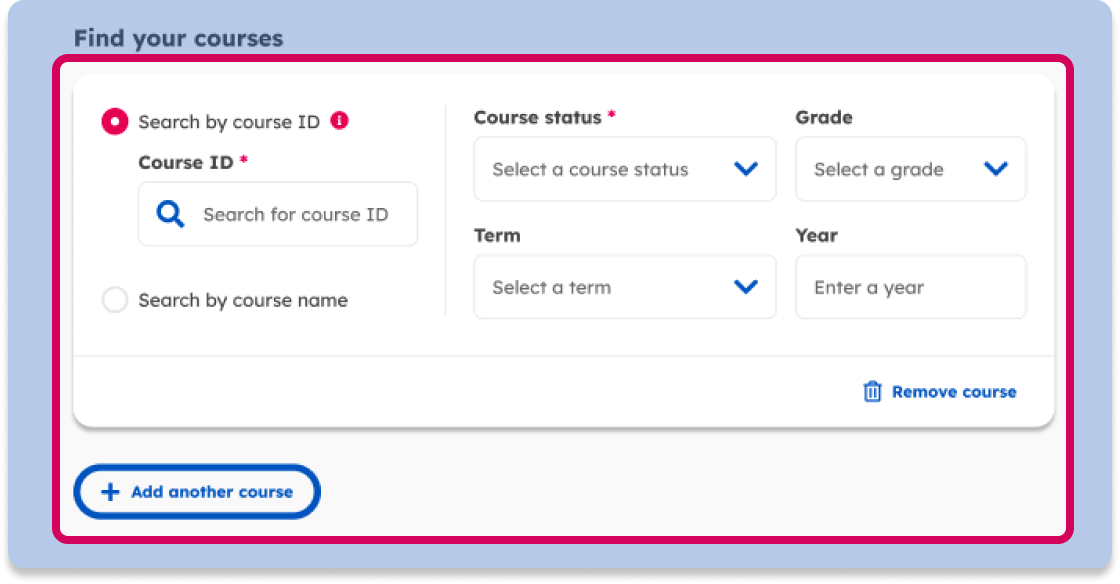
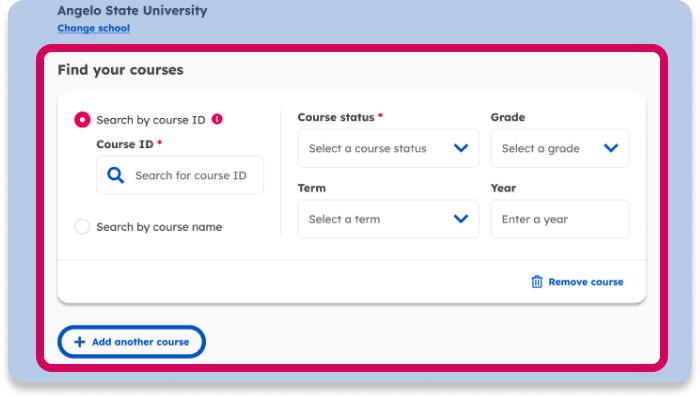
Use the Add another course button to add additional courses.
When finished, use the Add courses from another school link to add courses from another school. Or the Finish button to return to the Learner Profile.
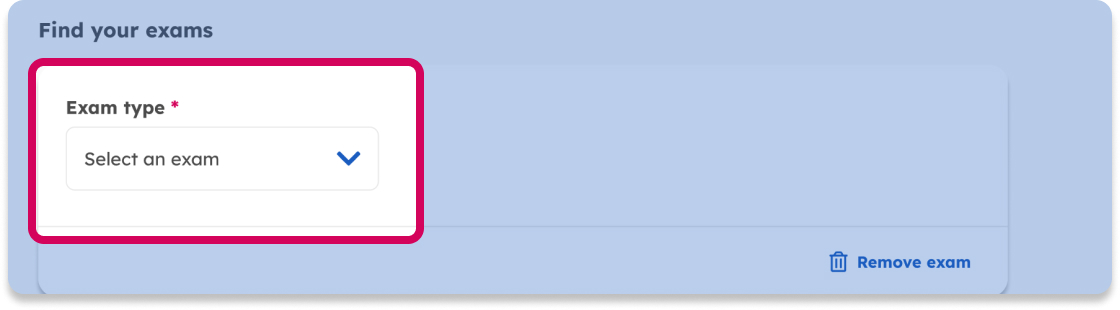
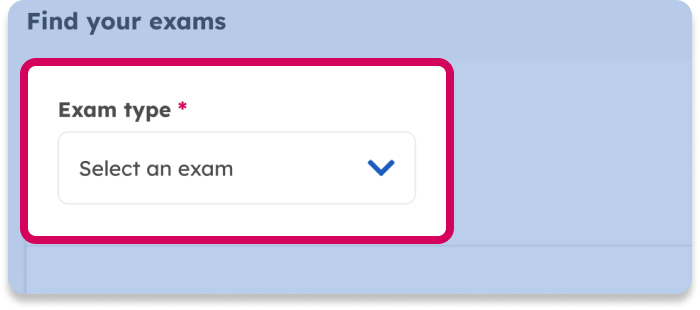
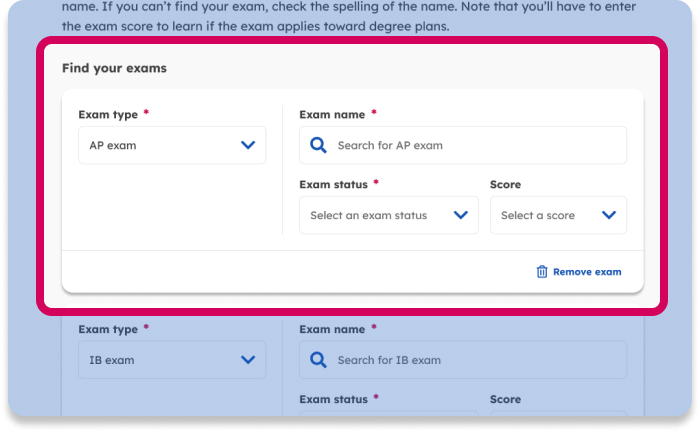
To add exam credits
Choose the exam type from the dropdown. Next, search for the name of the exam (e.g., AP Biology)
Select the exam status and your score, if completed. You need at least a score of 3 or higher on an AP exam to get credit, and criteria varies by school. Some colleges only accept a score of 4 or 5. A score of 2 or below is typically not accepted, although there are exceptions.

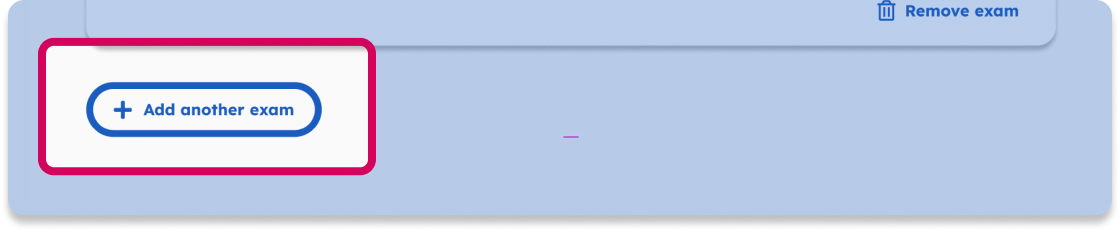
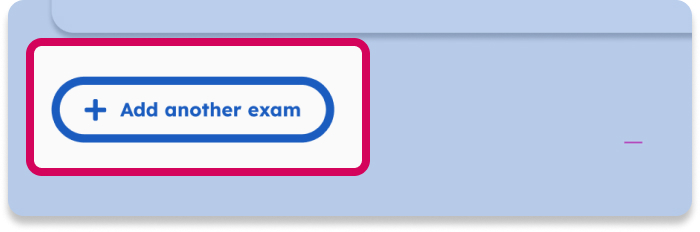
Use the Add another exam button to keep adding exams.
When complete, use the Finish button to populate your exam scores to your Learner Profile
Ready to start? Add your college courses and exam credits to your course history.
How to search and compare degree plans
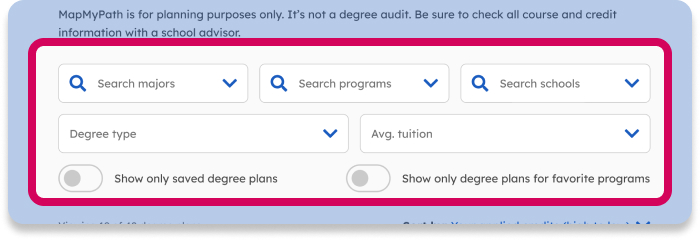
The Search degree plans screen allows you to explore degree requirements at Texas public colleges. Use the filters to search degree plans by major, program, school, degree type, or average tuition.
Use the toggle to filter your results by your saved degree plans or those that match your favorite programs.
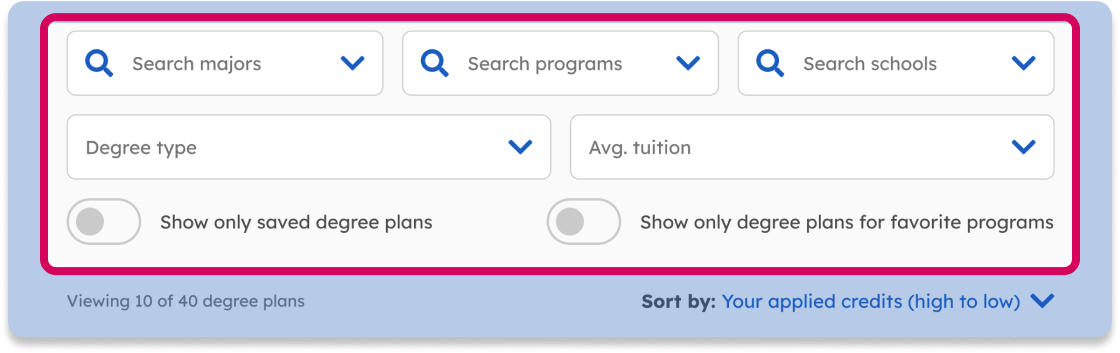
Results will populate by the degree plans with the highest number of applied credits first. If you’ve added college courses and exam credits to your course history, you can see how they apply.
The Below average cost badge informs you if a degree plan is below average cost compared with others.
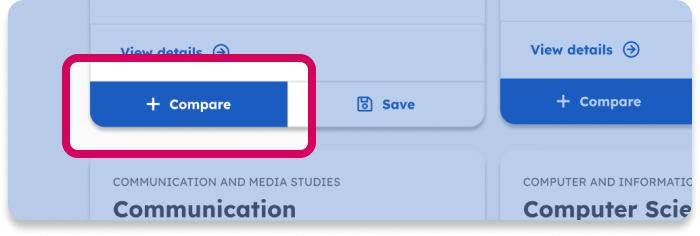
To compare degree plans
Use the Compare button to see a side-by-side comparison of up to three degree plans.
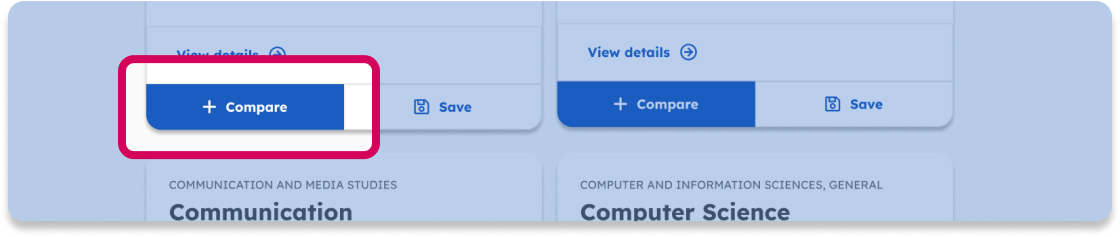
View the number of your credit hours that apply to each degree plan, average tuition per school, required courses, elective options and more.
This can help you determine which school is the best choice based on the criteria that are important to you.
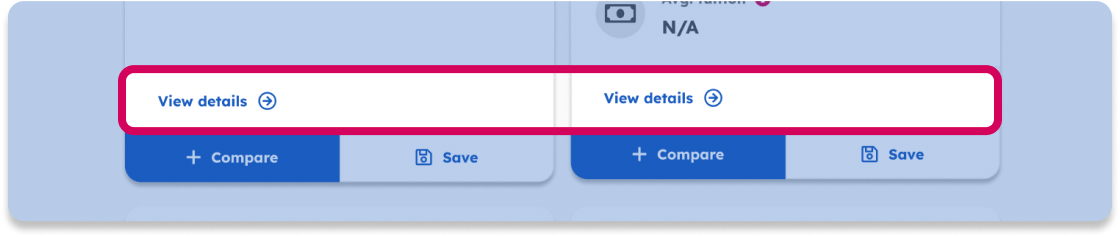
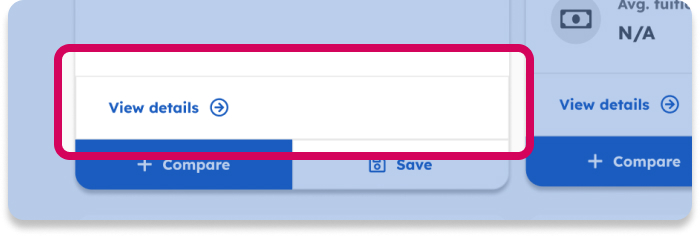
To learn more about a degree plan
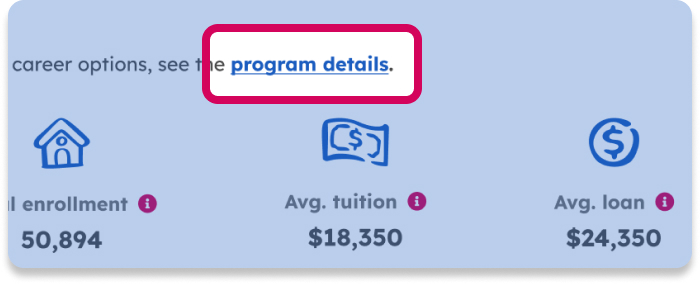
Use the View details link on any degree plan card to learn more about the program and school.
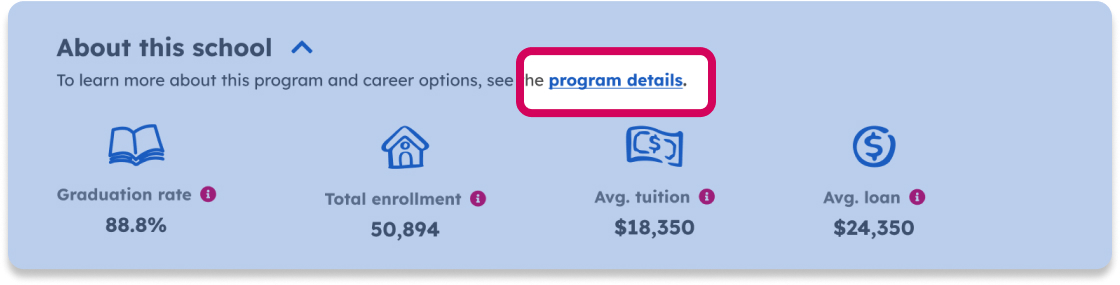
On the degree plan screen, the About this school section includes:
- Estimated time to degree – This number assumes taking a full course load of 15 credit hours per semester
- Graduation rate – This tells you the number of students who are graduating in a timely manner. Graduating on time can minimize loans and tuition costs
- Total enrollment – The total number of students on campus at all class levels
- Average tuition – This is the average cost of full-time tuition per student, including aid
- Average loan – This is the average debt from loans when a student graduates
Use the Program details link to learn more about the school’s program.
How to understand your degree plan details
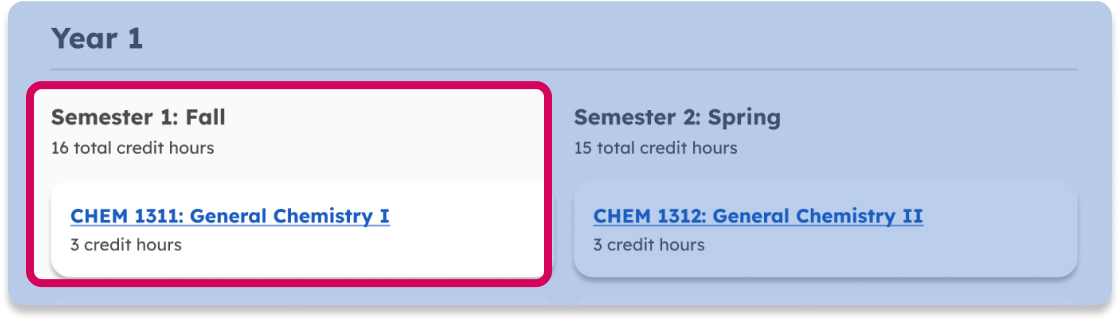
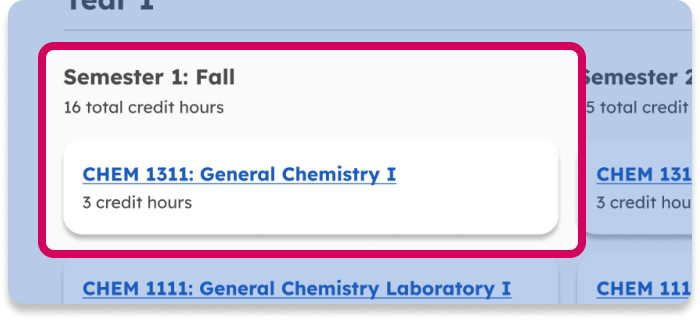
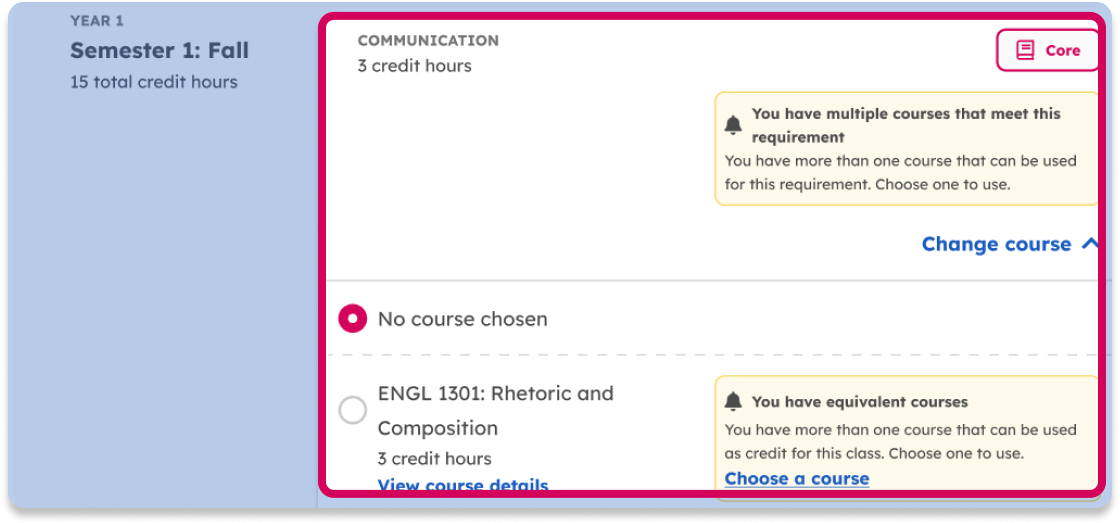
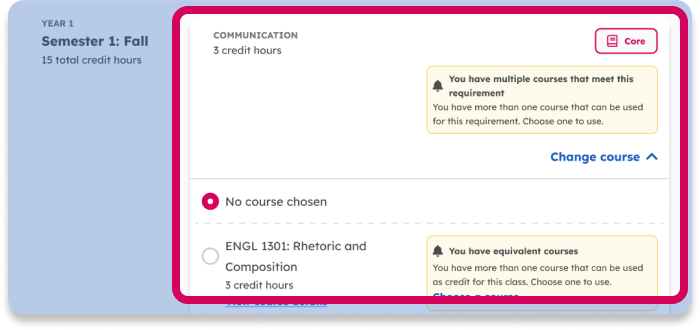
The Degree plan details section shows you the recommended course sequence for the degree plan.
If you haven’t added courses or exams to your course history, your degree plan will show you a basic view of required courses by semester. Each card will show the course’s name, its credit hours, and whether it requires a prerequisite.
If you’re logged in and have courses in your course history, you can see how they apply to your degree plan.
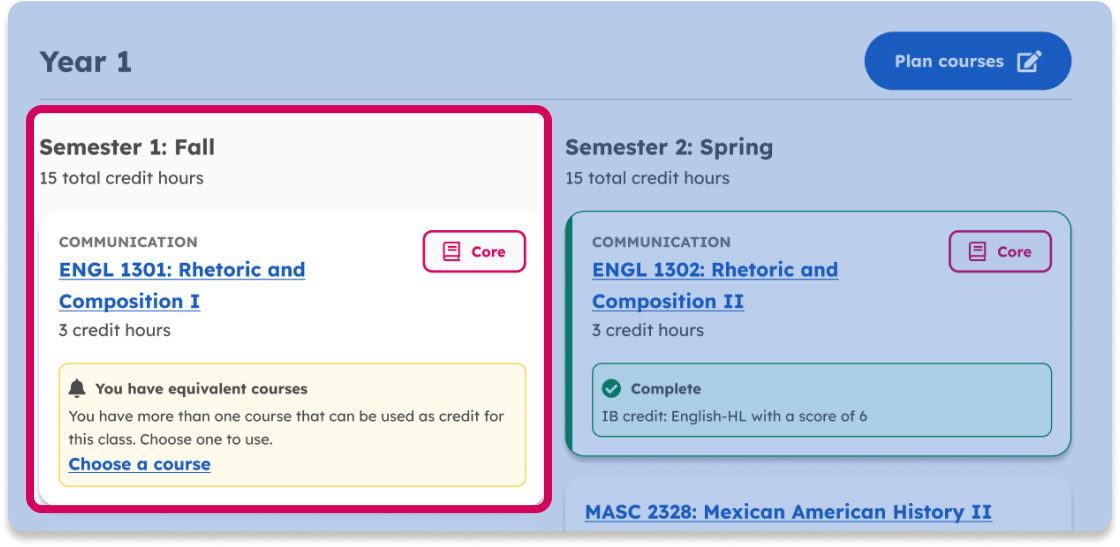

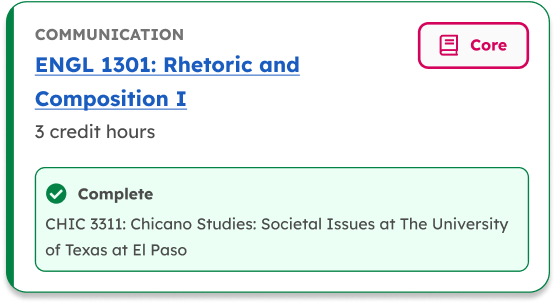
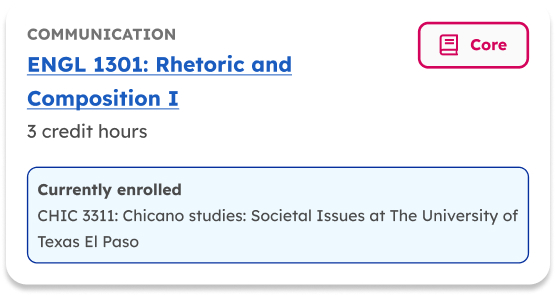
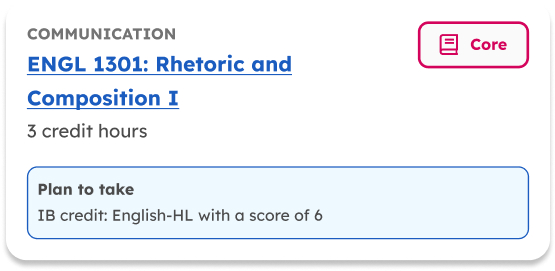
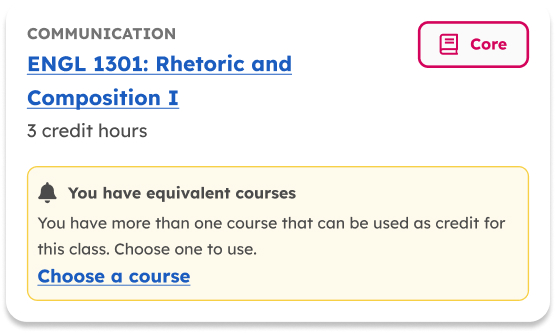
If you have a match, you’ll see one of the following statuses on the course card:
Complete – these credit hours have been applied to your progress towards a degree. No action needed.
Currently enrolled – you’ll need to update this card once you complete the course, but otherwise, no action needed.
Plan to take - you’ll need to update this once you complete the course, but otherwise, no action needed.
Have equivalent courses – When you’ve taken multiple courses that count for a single course credit, you’ll need to choose which one you want to use by using the Choose a course button.
You may also see additional information such as:
Prerequisite
Prerequisites are courses that you must take before taking the desired course.
Corequisite
Corequisites are courses that you must take at the same time as the desired course.
Course ID
The course prefix and course number for a particular class. A course prefix is four letters, such as ACCT for accounting. It's sometimes referred to as a subject code or department abbreviation.
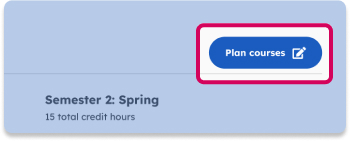
To make changes to your degree plan
To change courses in your degree plan, use the Plan courses button.

Within the Plan courses screen, you can:
- Choose or change courses you want to apply to a course requirement
- Add courses to your course history
- Find equivalent courses, corequisites, and prerequisites
- Select the Save courses button at the bottom of the screen once finished. This will return you to the Degree plan details screen
Select the Save courses button at the bottom of the screen once you’re finished. This will return you to the degree plan details screen.
To track your progress
Once your degree plan is up to date, save it to your Learner Profile. You can return to this degree plan and track your progress towards your degree.
You can also download a PDF to keep for your reference or share with an advisor.
Ready to try it out yourself? Start planning